
Craft Room Tour Embossing Powder Storage

By Craftroom Storage

EmbossingPowder4

Hi all,

I’m back with a quick idea on how to store some of those loose powders, glitters or small embellishments in your craft space. I am always on the hunt for something that doubles as both tidy and functional when it comes to organizing my craft room. My room doubles as an office space so I like everything labeled and put away when not in use.

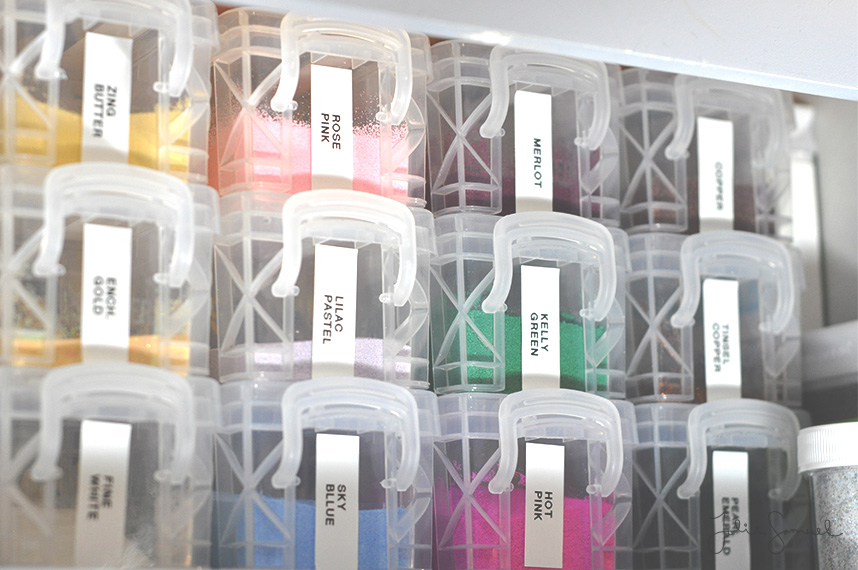
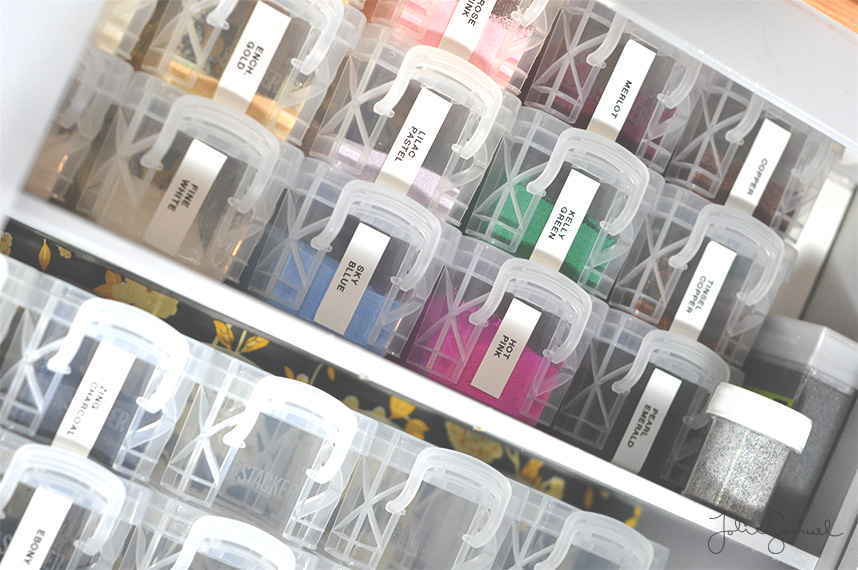
When I came across these little containers from Advantus I immediately knew how I could put them to use. I decided to dump all the varying sizes and shapes on embossing powders into these jars. I gave each a label on the sides and on top of the lid to let me know the brand and shade I had in each and then stacked them 3 high in a little cubby I have above my desk.

Here’s a closer look at these containers.

Although they do come in several different colors, I enjoy seeing the color of the powders come through and thought clear would be better suited for my space. I purchased mine here.

For those of you who are looking for a clean and tidy way to organize your space. I highly recommend this solution.

Embossing-Storage-2

Embossing-Storage-1

Kraft Envelopes For Party Favors

By Planner Stationary & Accessories

Set2

Hi all,

So it seems that wedding season and times of formal parties all happen during the summer. Today I wanted to create a little project to embellish the thought of party favor bags.

To start I grabbed a roll of my favorite kraft paper and cut several (hundred) dies of this bag template. It included score marks which made it easier to figure out where to fold every flap.

How darling is the bag itself!? To embellish them I have several of these doily type adhesive embellishments in my stash. I slowly separated them out to create bundles of envelopes to package up.

Picture1

Here they are ready to go. They can be used with the gusset, which makes them stand up on their own. Or they can be used flat if you pinch the bottom.

I’m so in love with all things kraft and white so you bet I’ll be making many more of these in the near future!

Floral Card Using Mutli Layered Heat Embossing

By Cards

FloralCard

Hi all,

How many times have you cleaned your room and stumble upon something you’ve had for the longest time? That’s the feeling I have about the corner of my craft room that houses embossing powders. I’ve spent the last few posts re-discovering the powders all over again. For this card, I decided to swap out my usual stamp inks for only embossing powders.

FloralCard2

I grabbed my favorite floral set from Altenew and some Versa mark ink. I stamped the bottom layer of a flower and heat embossed it in a light color gradient of pink. Then I stamped directly on top of the embossed image and stamped the layer of details included in the stamp set. Next, I heat embossed in a darker shade.

Once the stamping was complete I cut out the images and layered them onto my card base.

Here’s how the whole project came together.

*~———- * LINKS * ———-~*

DIY BLOG :https://www.joliesamuel.com//
FACEBOOK PAGE: https://www.facebook.com/joliesamuelc…
INSTAGRAM : https://www.instagram.com/joliesamuel/
TWITTER : https://twitter.com/TheJolieSamuel

*~———- * SUPPLIES * ———-~*

• Bazzill Card Shoppe Marshmallow cardstock — http://amzn.to/2aiHd0A
• Altenew Vintage Roses stamps — http://amzn.to/2aiHctu
• W Plus 9 Fresh Cut Florals stamps
• Versamark Watermark/Resist Ink Stamp Pad — http://amzn.to/2aeLKQL
• Tsukineko VersaFine Onyx Black Ink Pad — http://amzn.to/2aeLBg7
• American Crafts Zing! ROSE Opaque Embossing Powder — http://amzn.to/2a2oQIR
• Inkadinkado Hot Pink Embossing Powder — http://amzn.to/2acpwP3
• Inkadinkado Kelly Green Embossing Powder — http://amzn.to/2acpwP3
• Recollections Merlot Embossing Powder
• Stampendous Lilac Pastel Embossing Powder — http://amzn.to/2abqZBR
• Stampendous Pearl Emerald Embossing Powder — http://amzn.to/2aeL65N
• Scor-Tape 1/4in double-sided adhesive tape — http://amzn.to/2a90N0z
• Scor-Tape 1/8in double-sided adhesive tape — http://amzn.to/2aeLt0k

Birthday Balloons with Iron-Off Technique

By Cards

BalloonHi everyone!

I’m back with another card featuring the use of heat embossing. As I’ve been taking on the HeatWave class over at OnlineCardClasses and have been enjoying breaking out these powders for some fun takes on cards. For this

For this card, I wanted to use the iron-off technique as an alternative method in masking off my stamping. I first stamped the images I wanted to be in the foreground and then added a clear embossing over them. Then, I continued stamping my image being sure to overlap the embossed images. Since the embossing powder is sleek it resists ink and therefore made the second set of stamped images look like they are behind the first. To remove ink off of the clear embossed images I simply used a baby wipe and cleaned off as much ink as I could.

To iron-off the embossing powder, I sandwiched my project between a towel and a piece of paper. As I ironed over my project the embossing powder melts itself again and sticks to the scrap paper rather and removes itself entirely from the project. This leaves just the stamping and vibrant colors to show.

I love this technique in that it is an easy method at masking and is pretty precise at it as well. To finish the project off I added some detailed stamping and trimmed down my stamped piece.

Here’s a look at how the entire project came together.

Thanks so much for stopping by. Feel free to leave any questions or comments on projects you would like to see in the future!